


Malware analysts are always eager to expand their malware investigation. Thankfully, modern tools allow researching threats more properly. ANY.RUN sandbox is a service where you complete your task effortlessly with a wealth of data. Today we will talk about two helpful features: MITM proxy and FakeNet, so you can analyze threats even faster and get more information.
MITM proxy for HTTPS
Different types of malicious content employ a secure connection to communicate with the host servers. And the analysis of that traffic can bring a lot of juicy data essential for SOC work. The HTTP traffic isn’t encrypted and goes via 80 HTTP ports, and if we intercept it, there is no need to do anything else – all the content is already displayed there.
But sometimes it takes some effort to find out the required information. In most cases, malware is more complicated, and it may use HTTPS and 443 port, which is more secure traffic. And this time, the content will be encrypted.
Malware analysts’ goal is to decrypt to reveal hackers’ secrets. And in this very case, the MITM proxy feature comes out.
In a man-in-the-middle (MITM) attack scheme, crooks impersonate one of the sides of a two-party transaction, manipulating or stealing data or transfers. MITM proxy is a tool that also imitates one of the sides. MITM proxy is ANY.RUN’s feature for HTTPS traffic analysis. With the MITM feature, you can get:
- full URLs
- request headers
- content of request and response connections to the C&C server.
How does MITM proxy work?
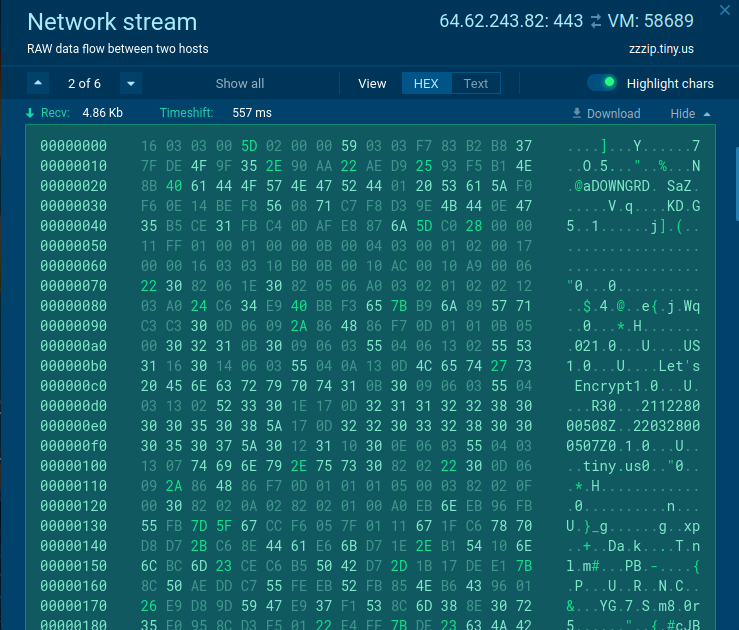
Using the Man-in-the-middle feature, you intercept the HTTPS requests. By doing so, this feature gets the keys to decrypt traffic. And during the analysis in real-time, you can monitor the process of HTTPS traffic’s decryption. In the Connections and HTTP requests, information is displayed conveniently. Click on the content from different packets, IPs, and URLs. And most of the time, content is available for research. You can see where and what was collected by the crooks. The information will be readable and not just a set of numbers or symbols.
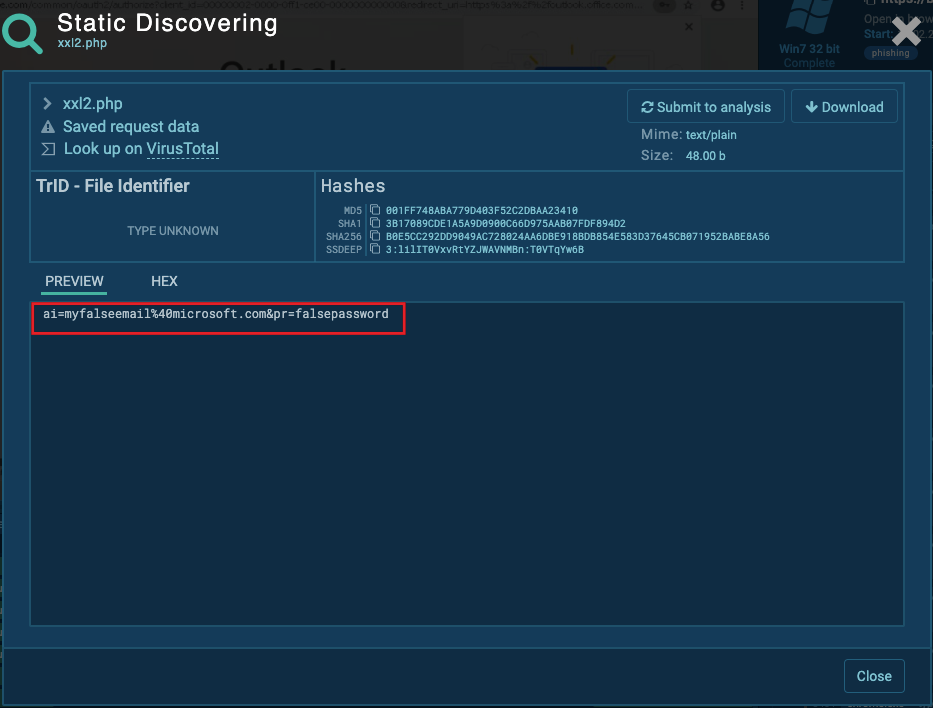
For example, the following sample contains a phishing form. And if we input fake data, it will be displayed in the HTTP Connection section owing to the HTTPS MITM Proxy feature.
When the analysis is completed, you can save HTTPS conversations and download the PCAP file with the sample’s traffic. Moreover, the investigation with MITM proxy gives an opportunity to get SSL keys that you can use for further analysis, decryption, or replay in tools such as Wireshark.
We recommend watching an example of Danabot sample analysis showing how to use MITM HTTPS proxy.
To sum it up, the MITM proxy feature is an essential part of malware analysis. IPs, URLs, and stolen data can be tracked, monitored, and investigated more properly. Moreover, you get a complete and detailed picture of the malicious sample’s intentions and activities.
FakeNet
Besides the MITM proxy, there is one more feature that you can work with while investigating the network traffic – the FakeNet functionality. Sometimes malware, after the infection, tries to send some packets. And if it doesn’t get a response, the malicious software may hide for a while and stay undetected or even stop execution. To trigger advanced threats, ANY.RUN has the FakeNet feature to answer malicious file requests. It creates answers for malware automatically by redirecting network traffic and simulating real network services.
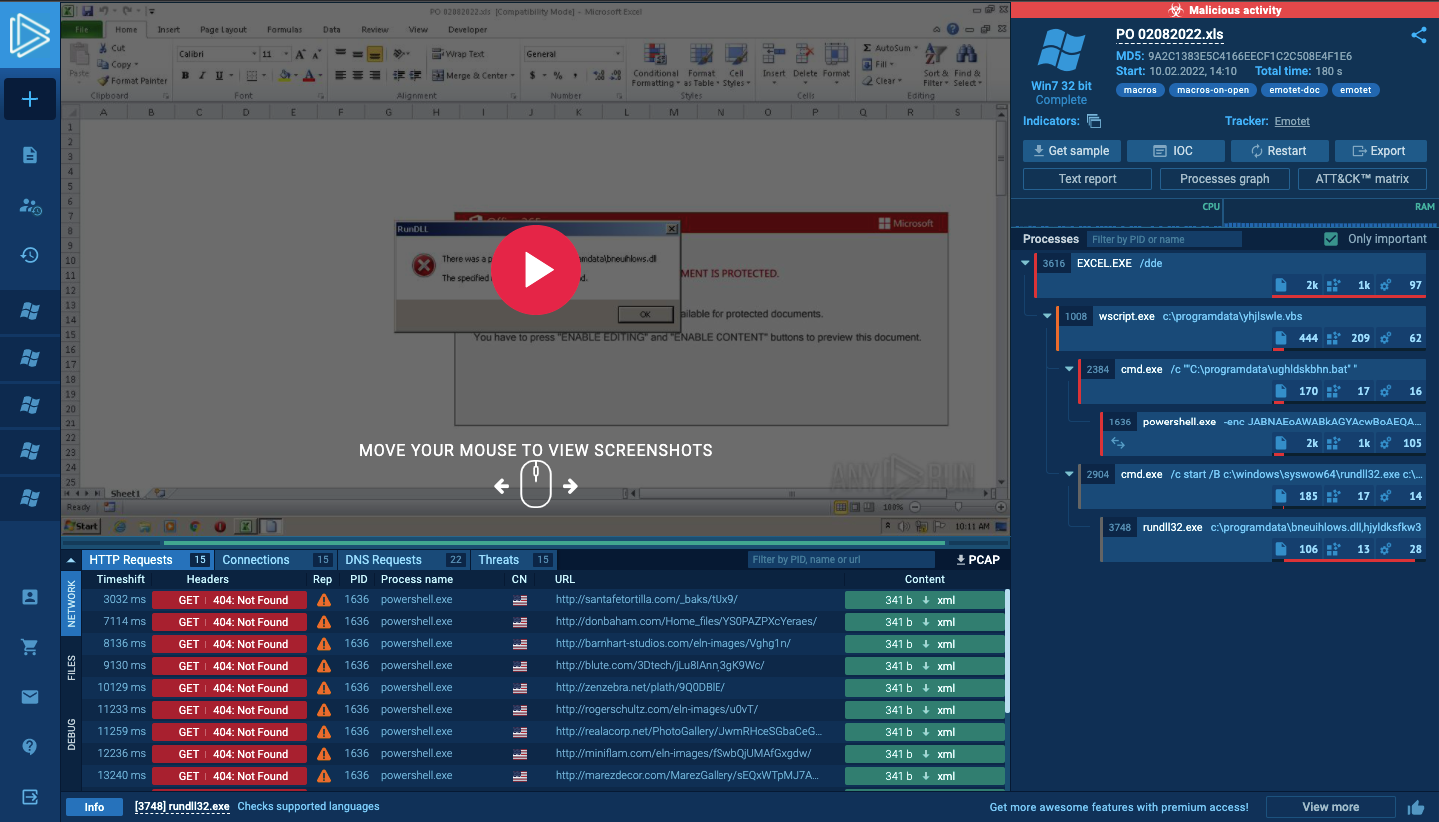
Let’s take a look at the Emotet sample. There is a list of 15 or more URLs from which the malicious document tried to download the main payload. If we run a sample in the isolated network, we can trigger only one address, while others stay invisible or even get deleted. But if we turn on FakeNet, it answers and returns a 404 answer. In this case, Emotet understands that a useful load has been deleted from the server, and it can take the next URL from the list until all of them are used.

FakeNet saves malware analysts time: you don’t need to look for a special tool, download it and install it for this matter. Everything is already here in your virtual machine. Maximum information will be extracted automatically, without any effort.
How to use MITM proxy and FakeNet in ANY.RUN?
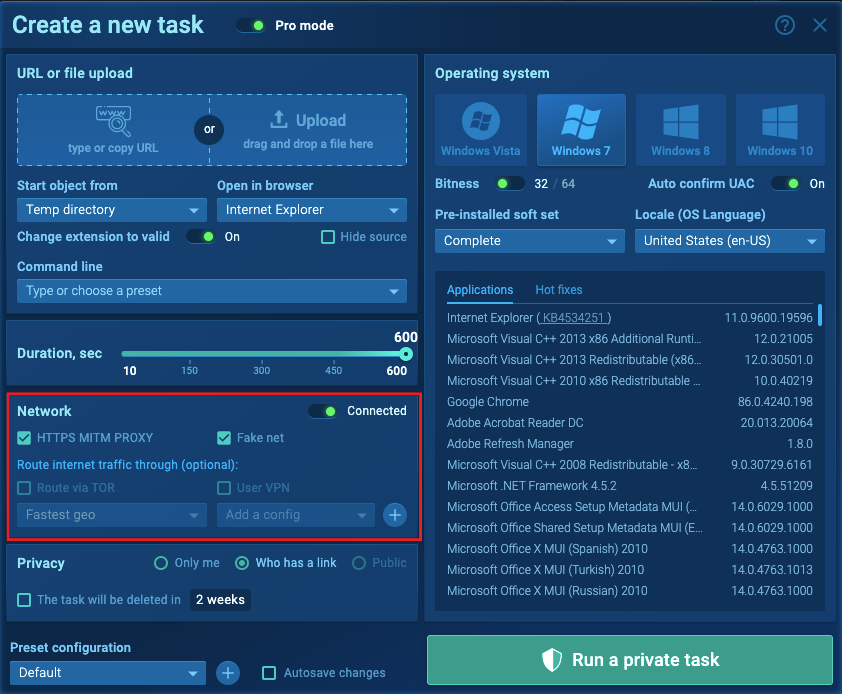
ANY.RUN has a bunch of configurations so that you can customize your virtual machine for analysis easily and fast. Create a new task and switch to the Pro mode. And here comes the good stuff: you can do whatever you want and make a specific VM for your objectives. But this time, we focus on the Network block. And that’s pretty much it. Choose a feature you need, or get both of them – check the MITM proxy and FakeNet boxes.
The next step is to run a task. And owing to the Instant access technique, you start the analysis immediately. Right now, we need to focus on the HTTP Request in the Network block. You can find it in the first section right under the interaction field.
Feel free to ask questions in the comments and leave your feedback if the MITM proxy HTTPS communication analysis tool and FakeNet help you out in your work!
What ANY.RUN feature should we cover next?
2 comments


Thank you for the article! Excellent mechanisms for analytics!
Thank you, and good luck in hunting!